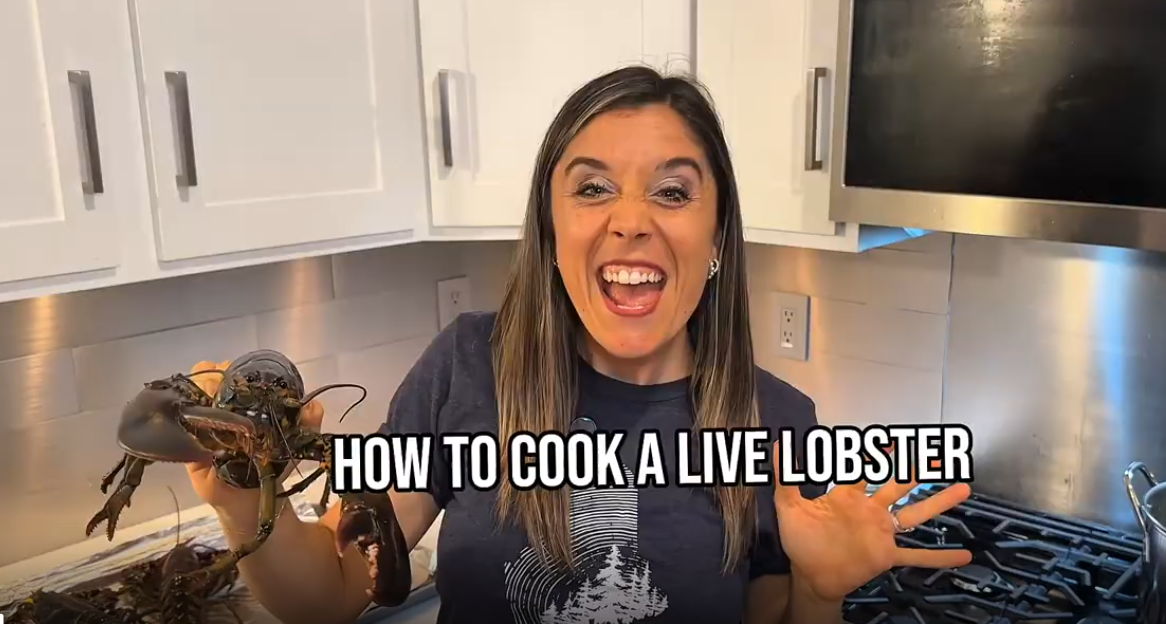
How to Cook Live Lobster at Home: Easy Step-by-Step Guide
Not sure how long to cook your lobster? Use our cook-time calculator and built-in timer, no guesswork.
Before You Cook: Handling & Storing Live Lobster
If you’ve got live lobsters on hand but aren’t cooking them immediately, proper storage is key to keep them healthy and lively. Keep live lobsters cold, ideally in the refrigerator, covered with a damp cloth or in a ventilated container (a sturdy paper bag or a cooler with some wet newspaper or seaweed). Do NOT put live lobster in fresh water or on ice directly. Fresh water can kill lobsters, and ice may freeze them; lobsters do best kept cold (around 40°F) and moist, mimicking their ocean habitat. Also, plan to cook them within 24-36 hours of receiving them for best freshness; the sooner, the better. Lobsters can survive out of seawater for a day or two if kept cold and moist, but beyond that their quality and vitality decline.
When handling live lobsters, always grasp them by the body (the carapace) just behind the claws. Avoid picking them up by the claws or tail to prevent injuries (to them or you!). Most shipped lobsters will have rubber bands on their claws; leave these on while handling the live lobster to protect your fingers. (You can remove the bands right before cooking if you prefer, but only do this with a very calm or chilled lobster to avoid any pincers catching you!). Some chefs claim the rubber can impart a slight taste if boiled with the bands on, but the difference is minor. If you’re a beginner, it’s perfectly fine (and safer) to cook with bands on and remove them after cooking.
Humane Tip: Worried about the lobster suffering? One widely used method is to sedate the lobster by chilling. Place the lobster in your freezer for about 15–20 minutes just before cooking. This “puts the lobster to sleep” and significantly numbs its senses. A sedated lobster will move less when it hits the boiling water, which many people feel is more humane (and it also makes it easier to remove the rubber bands without the lobster fighting back). While there’s ongoing debate about crustacean pain, a quick freezer nap and a swift drop into boiling water head-first is generally considered a humane way to dispatch a lobster.
What You’ll Need
Before we start cooking, make sure you have everything ready to go. Here’s what you’ll need for a smooth lobster-cooking experience:
- Live Lobster(s): The star of the show! We recommend lively, hard-shell Maine lobsters for the sweetest meat. (Each adult serving is usually a 1 to 1½ pound lobster.)
- Large Stockpot: An 8-quart pot can handle 1 lobster comfortably, while a 16-quart pot is good for 2–3 lobsters at a time. The pot should be big enough for all lobsters to be fully submerged without overcrowding. If cooking many lobsters, you may need to do batches or use multiple pots.
- Water & Salt: Lots of water to fill the pot, and sea salt or kosher salt for seasoning it. Aim for a salty brine similar to seawater – about 2 tablespoons of salt per quart of water is a good rule (roughly ½ cup salt per gallon). This will enhance the lobster’s flavor by cooking it in a saltwater mimic of its natural environment. Tip: if you live near the ocean and have access to clean seawater, you can use that instead of mixing salt and water!
- Tongs or Gloves: Heat-proof tongs (or long-handled gloves) are essential for safely lowering lobsters into the pot and retrieving them after cooking. Lobsters will turn bright red and be extremely hot when done, so protect your hands.
- Lid & Stove: A tight-fitting lid helps bring water to a boil faster and keeps it boiling. You’ll need a stovetop or a stable outdoor boiling setup capable of bringing a large volume of water to a rolling boil.
- Timer: A kitchen timer or stopwatch to track cooking time accurately. Timing is crucial for perfect lobster. Too little and it’ll be undercooked (and unappetizing), too much and it can turn rubbery. Or use our web timer.
- Bowl of Melted Butter: Have a small pot of melted butter ready for serving. Nothing complements lobster better than warm, drawn butter. You can clarify it if you like (to remove milk solids) or simply melt some high-quality butter. A squeeze of fresh lemon in the butter is a nice touch too.
- Lemon Wedges: (Optional but recommended) Fresh lemon adds a bright pop of flavor. Many lobster lovers squeeze lemon over the meat or into the butter dipping bowl. Prepare a few wedges for serving.
- Platter or Tray: Something to hold the cooked lobsters. It can be a large platter or tray (lined with paper towels to catch any excess water). This will make it easier to carry and serve the hot lobsters.
- Napkins and Tools for Cracking (for later): Eating the lobster will be messy (more on that in How to Eat a Live Lobster Article). If serving immediately, provide lobster crackers, picks, and plenty of napkins. But we’ll get to that after cooking – first, let’s get these lobsters perfectly cooked!
Now that everything is assembled, let’s get cooking.
Step-by-Step: How to Boil a Live Lobster
Follow these simple steps to boil your live lobster to perfection. (You can also watch our video above to see each step in action!)
- Fill and Heat the Pot: Place your large pot on the stove and fill it with water. Aim to fill about ¾ of the pot with water, leaving room for the lobsters so it won’t overflow. For reference, you’ll need roughly 3 quarts of water per 1½ lb lobster to ensure they’re fully submerged. Add the salt to the water – about 2 Tbsp per quart (the water should taste as salty as the ocean). Give it a stir to dissolve. Put the lid on and bring the water to a rapid boil. This might take a little time due to the volume of water, so be patient. (Tip: Starting with hot tap water or using multiple burners can speed this up.)
- Prepare the Lobster (Optional Sedation): While the water is heating, this is a good time to prepare your lobster. If you wish to humanely sedate the lobster, place it in the freezer for about 15 minutes now. It will become sluggish and less reactive. Avoid keeping it in much longer than 20 minutes, as you don’t want it frozen, just chilled. If you do this, you can also take the opportunity to remove the claw bands carefully (with gloved hands or a kitchen towel for grip) while the lobster is sleepy. If you choose not to freeze, you can still remove the rubber bands right before boiling – just be extremely cautious, as the lobster will be feisty.
- Add Lobsters to the Boiling Water: Once the water is at a rolling boil, you’re ready to cook. Using your tongs or gloved hand, pick up the lobster firmly around the body. Lower it into the pot head-first and upside down, quickly and confidently. Why head-first? This causes almost instant death for the lobster (so it’s the most humane) and it minimizes splashing or thrashing as the tail goes in last. The boiling will temporarily stop when you add lobsters (especially if adding multiple), and that’s okay. If you have more than one lobster, add them one at a time in the same way, and do not crowd the pot. (If they don’t all comfortably fit, cook in batches rather than forcing them in.) After all lobsters are in, cover the pot to help regain the boil.
- Return to Boil and Start Timing: Keep the heat on high. When the water returns to a full boil, start your timer. This is an important detail: only start timing once the water is boiling again after adding lobsters. Boiling may have paused momentarily when the lobsters went in, but once it’s back, that’s your cue. Boil the lobsters for the time appropriate to their weight:
- For a 1 lb lobster, cook about 7–9 minutes once boiling resumes.
- For a 1.25 lb (20 oz) lobster, about 8–10 minutes.
- For a 1.5 lb lobster, about 11–12 minutes.
- For a 2 lb lobster, around 13–15 minutes.
- For each additional ½ lb, add ~2 more minutes of cooking time.
These times are guidelines for hard-shell lobsters. (Soft-shell lobsters cook a bit faster, but the above times ensure even hard shells are cooked through.) The lobsters are done when their shells turn a vivid red and the juices that run out are white (not translucent).
⚠️ Don’t Overcook: It’s better to slightly undercook than overcook, because you can always cook it a tad more but you can’t undo rubbery lobster. If in doubt, err on the lower end of the time range and check doneness (we’ll explain how below). Undercooked lobster meat will be translucent and gelatinous – not appetizing – so you do want it fully opaque.
🔥 Pro Tip – Multiple Lobsters: If you’re boiling more than one lobster at once, do NOT multiply the cooking time by the number of lobsters. This is a common mistake (even voice assistants have gotten it wrong!). Example: If it takes ~9 minutes for one 1-pound lobster, cooking three 1-pound lobsters also takes around 9–10 minutes after the water re-boils, not 27 minutes. The lobsters cook concurrently in the same pot. The only adjustment with multiple lobsters is that it may take a bit longer for the water to come back to a boil initially (since you’re adding more cold mass). Once the boil is back, use the weight of an individual lobster to determine time. So for three 1-pounders, boil about 9–10 minutes after re-boil. For two 2-pounders, boil ~13–15 minutes after re-boil, etc. This ensures each lobster is perfectly done without turning to rubber. - Check for Doneness: When the timer is up, you can double-check that your lobsters are fully cooked. Properly cooked lobster will be bright red on the outside (the shell goes from dark or mottled to uniform red). The meat inside will have turned opaque white (and the roe, if present, bright red). If you want to be extra sure, use an instant-read thermometer: insert it into the thickest part of the tail (through the underside, between the shell segments) or into a claw. The internal temperature should read 140–145°F. Another easy test: tug on one of the lobster’s antennae – it should pull out with no resistance if the lobster is done. You can also cut into where the tail meets the body to peek at the meat; it should be white, not translucent. If it’s not done, return it to the pot for another minute or two. Just be cautious not to overcook – as soon as it hits that doneness point, you’re good.
- Remove and Cool Slightly: Using your tongs or a long-handled strainer, carefully pull each lobster out of the pot. Hold it above the pot for a moment to let excess water drain off. Transfer the lobsters to a platter or shallow bowl. They will be extremely hot, so give them a few minutes to cool enough to handle (and so diners don’t burn their fingers!). Avoid leaving boiled lobsters in the hot water once they’re done, as they will continue to cook and can overcook easily. For the same reason, don’t just turn off the heat and let them sit in the pot; get them out of the water. To stop the cooking quickly, you can briefly rinse the lobsters with cold water or place them in a sink with a bit of cold water for a minute. This cooling step halts the cooking process, locking in perfect tenderness (and also makes them cool enough to eat sooner). Pat them dry afterwards so water doesn’t dilute your drawn butter.
- Serve and Enjoy: Your lobsters are ready to serve! Arrange them on a platter; they’ll look gorgeous with that bright red color. Serve with individual cups of melted butter (and lemon wedges on the side). You can season the melted butter with a little garlic or keep it plain and pure.
Pro Tip: Before digging in, you may want to put on a bib or apron, eating lobster can be messy (those claws can spray a bit of “lobster juice” when cracked!). Restaurants often give plastic bibs for a reason. Have plenty of napkins handy. When plating, you can also include sides like corn on the cob, boiled potatoes, or a crusty piece of bread (great for dipping in lobster-infused butter). If you have guests who are new to lobster, consider pre-cracking the claws slightly or at least helping them with the first one. And don’t forget to savor that first bite of sweet, tender lobster meat dipped in warm butter – it’s heavenly. - Leftovers and Extra Tips: If by some miracle you have leftover lobster meat, don’t let it go to waste! Pick all the meat from the shell. Chop it up and the next day you can make an indulgent lobster roll (just toss the chilled lobster meat with a little mayo, lemon, and serve in a toasted bun). You can also use leftover lobster in salads, pastas, or mac & cheese. The shells themselves can be saved to make a rich lobster stock or bisque, just freeze them in a bag until you’re ready to boil them for stock. This way, you get every bit of flavor from your purchase. Talk about nose-to-tail (or claw-to-tail) usage!
Conclusion & Next Steps
Congratulations, you’ve just cooked a live lobster! Not so hard, right? With this simple method, you can now confidently boil lobsters at home for special dinners, family gatherings, or whenever you crave that taste of Maine’s coast. The keys are salty water, proper timing, and a little courage to handle the lively critter, and you’ve got it all down. The reward is succulent, tender lobster meat that is truly one of life’s great culinary pleasures.
We hope this guide has demystified the process and empowered you to be a lobster-cooking pro. Remember, practice makes perfect, not that anyone will complain if you practice by cooking more lobsters! If you found this helpful, be sure to check out our other resources on ShopLobster.com. In fact, the journey isn’t over: now that your lobsters are cooked, it’s time to enjoy them to the fullest. Cracking into a lobster and extracting all that sweet meat can be another intimidating task for newcomers, but don’t worry, we’ve got you covered there too.
👉 Up Next: How to Eat a Lobster Like a Pro: Follow our step-by-step guide on eating a whole lobster so you won’t waste a single morsel. From claws to tail to the hidden goodies in the body, we’ll show you how to get it all (and look like you’ve been doing it for years).
Happy cooking, and enjoy your lobster feast!
Enter your live lobster weight to get the cook time for boiling or steaming. Optional: parboil, then finish on the grill or under the broiler. Start a built-in timer.
Live Lobster Cook Time & Timer
- Start timing after water re-boils or steam is at full power.
- Cooking multiple lobsters at once does not multiply time.
- For parboil methods: parboil 5–7 minutes, then finish 4–6 minutes over high heat.
Buy Live Lobster:


Live Lobster Cooking Time Chart
For perfectly cooked lobster tails every time, use this handy cooking time chart based on tail weight:
| Live Lobster Weight | Boiling (after water re-boils) | Steaming (at full steam) |
|---|---|---|
| 1.0 lb | 7–9 min | 9–11 min |
| 1.25 lb Live Lobster | 8–10 min | 10–12 min |
| 1.5 lb Live Lobster | 10–12 min | 12–14 min |
| 2 lb Live Lobster | 12–14 min | 14–16 min |
| 2.5 lb | 15–17 min | 17–19 min |
| 3 lb | 17–20 min | 19–22 min |
Important notes:
- Start timing only after the water returns to a rolling boil or the pot is at full steam.
- Cooking multiple lobsters at once does not multiply the time. Use the time for one lobster of that weight.
- Check doneness: meat is opaque white, roe is bright red if present, and internal temp is 140–145°F.
- For best flavor, cook in well-salted water (about 2 Tbsp salt per quart).
- For grilling or broiling whole lobster, parboil 5–7 minutes, split, then finish over high heat 4–6 minutes until done.
Why Choose ShopLobster?
When you order from ShopLobster, you’re not just buying lobster, you’re bringing the coast of Maine straight to your table.
Here’s what sets us apart from the rest:
1. Caught Daily by Maine Lobstermen
Our lobsters are sourced directly from the cold, clean waters of Maine by local lobstermen with generations of experience.
2. Free Next-Day Delivery, Nationwide
Order by 11 AM ET and get your live lobster shipped the same day for next-day delivery. Every box is carefully packed with cold gel packs to ensure it arrives fresh, lively, and ready to cook.
3. Family-Owned, Maine Roots
We’re proud to be a family-owned company built on Maine fishing traditions. Every lobster we send represents decades of dedication, quality, and care.
4. Sustainably Harvested
We only partner with licensed Maine lobstermen who follow responsible practices to protect lobster populations for generations to come.
5. 100% Freshness Guarantee
If your lobster doesn’t arrive in perfect condition, we’ll make it right, guaranteed. That’s how confident we are in our process.
6. Everything You Need to Cook Like a Lobsterman
From our step-by-step cook time calculator and cooking videos to our easy recipes, we help you enjoy the full Maine experience, even if it’s your first time.
Frequently Asked Questions About Cooking Live Lobster
To cook a live lobster, bring a large pot of salted water (2 tablespoons sea salt per quart) to a rolling boil. Place the lobster head-first into the pot and start your timer once the water returns to a boil. Cook 1 lb lobsters for about 7–9 minutes, 1.5 lb for 10–12 minutes, and 2 lb for 12–14 minutes. For steaming, add 2–3 extra minutes. The meat should be opaque white and reach 140–145°F internally.
Both methods work. Boiling is faster and ideal for large lobsters, while steaming produces tender, more flavorful meat. For boiling, submerge completely in salted water; for steaming, place lobsters on a rack above 2 inches of boiling water, cover, and steam until shells turn bright red.
Average cook time is 7–9 minutes per pound for boiling and 9–11 minutes per pound for steaming. Larger lobsters (2–3 lb) may take up to 20 minutes. Always use a timer or our built-in Live Lobster Cook Time Calculator for accuracy.
Yes. For humane preparation and easier handling, place the lobster in the freezer for 15–20 minutes before cooking. This sedates the lobster without affecting flavor or texture.
Yes. Cooking time does not multiply, use the same time as for a single lobster of that weight. Ensure your pot is large enough and wait for the water to return to a rolling boil after adding the lobsters before starting your timer.
The shell will be bright red, the antenna will pull off easily, and the meat will be firm and opaque white. The internal temperature should be 140–145°F. Overcooked lobster becomes rubbery and dry.
Absolutely, salting the water is key for authentic flavor. Use 2 tablespoons of sea salt per quart of water to recreate natural ocean salinity.
Serve immediately with melted butter, lemon wedges, and sea salt. Add sides like corn on the cob, baked potatoes, or fresh rolls for a classic Maine lobster dinner.
Yes. Remove meat from the shell, cover, and refrigerate within 2 hours. Eat within 2 days or freeze for up to 3 months. Frozen lobster meat is perfect for lobster rolls, bisques, and pasta.
Yes, all our live lobsters are wild-caught in Maine by licensed, sustainable fisheries. We work directly with fifth-generation lobstermen to protect the species and local ecosystem.
Ready to Experience the Best Live Lobster?
LIVE MAINE LOBSTER
The ultimate fresh seafood experience, sustainably harvested and delivered overnight.
SHOP LIVE LOBSTER
FROZEN LOBSTER TAILS
Premium tails flash-frozen to preserve flavor and texture. Perfect for special occasions.

BEST LOBSTER MEAT
Ready-to-use claw, knuckle, and tail meat for effortless gourmet meals.
